It is important to note that for Homegroup to work, the two PCs must be connected to the same Home Network. This feature is disabled in Public Networks for obvious reasons. That said, here’s how to share files (including photos, documents, and videos) in Windows 10:
Sharing using Windows HomeGroup
Microsoft has for a while now been baking in a way to send files between computers since Windows 7. Microsoft included HomeGroup to allow Windows devices to share resources with other PCs on a local network with an easy to set up approach that anyone can use. HomeGroup is a feature best suited for small home networks to share files and printers with devices running Windows 10 If there’s a HomeGroup available on your network, click the button to join it. If not, you can set one up.
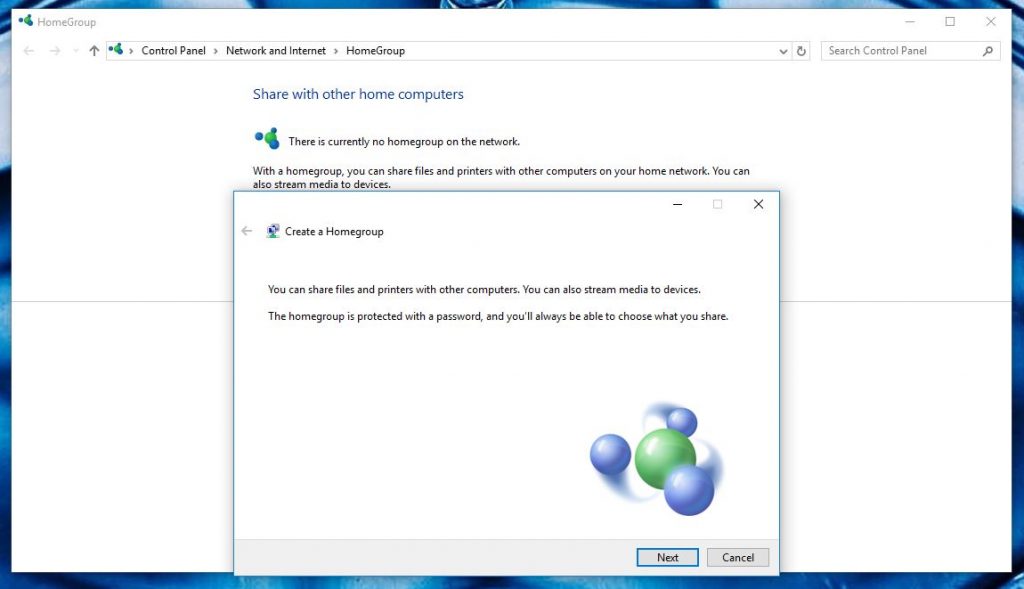
Setting up a new HomeGroup
Setting up a new HomeGroup only takes a few clicks, please follow these steps if you have no existing homegroup: Sharing files with a HomeGroup
Click Finish to create the HomeGroup.
To join an existing homegroup:
If a HomeGroup’s available, you’ll see information about it in the window. Click Join now. Select Next on the information window, then use the drop-downs to choose what to share with the group. Click Next again. Type the HomeGroup Password (anyone who has joined the group has access to it) and click Next to join. When you’ve joined a HomeGroup, it’s easy to share files and folders to it:
Open File Explorer (Win+E) and go to the file or folder you’d like to share. Right-click on the item, then move the cursor to Give access to:
You’ll see several options including ‘view’ and ‘view and edit’. Click view to let group members see the file, or view and edit to let them change it. You can also ‘Remove access’ to stop sharing an item.
After you’ve chosen, anyone in the group will have access to it through the HomeGroup link in File Explorer. If you only want to share the item with one person instead of the whole group, pick their name or click Specific People.
PS: To stop sharing a file with the Homegroup, navigate to the item, right click and choose toGive access to > Remove access. Also, while it is more straight foward to set this up in computers running the same Operating System, it can work on computers running Windows 7, 8, 8.1 and 10.